Introduction
Let's Encrypt is a free, open, and automated Certificate Authority (CA). For Transport Layer Security (TLS) encryption, it offers free X.509 certificates. Let's Encrypt aims to simplify the process of obtaining and installing certificates in order to make it simpler for websites to implement encryption.
In this article you'll learn how to obtain and automatically renew Let's encrypt wildcard certs on any hosting provider, without any manual DNS updates. To write this article I used Ubuntu 22.04.
What is ACME
Let's Encrypt uses the ACME (Automated Certificate Management Environment) protocol to issue certificates and to confirm that you are the owner of the domain you are requesting a certificate for. It is built on straightforward HTTP exchanges with a challenge and a response.
Installing software on your server that can communicate with the Let's Encrypt servers using the ACME protocol is required in order to receive a certificate from Let's Encrypt. This program is referred to as a "ACME client." There are a variety of ACME clients available, such as Certbot, created by the Electronic Frontier Foundation (EFF).
You may use the ACME client to ask for a certificate for your domain once you've installed it and created an account with Let's Encrypt. If the client's ACME challenges are successful in establishing your ownership of the domain, Let's Encrypt will grant you a certificate you may use to secure your website.
Prerequisites
- Linux server with root access
- Your own domain name
- Not be afraid of the command line :)
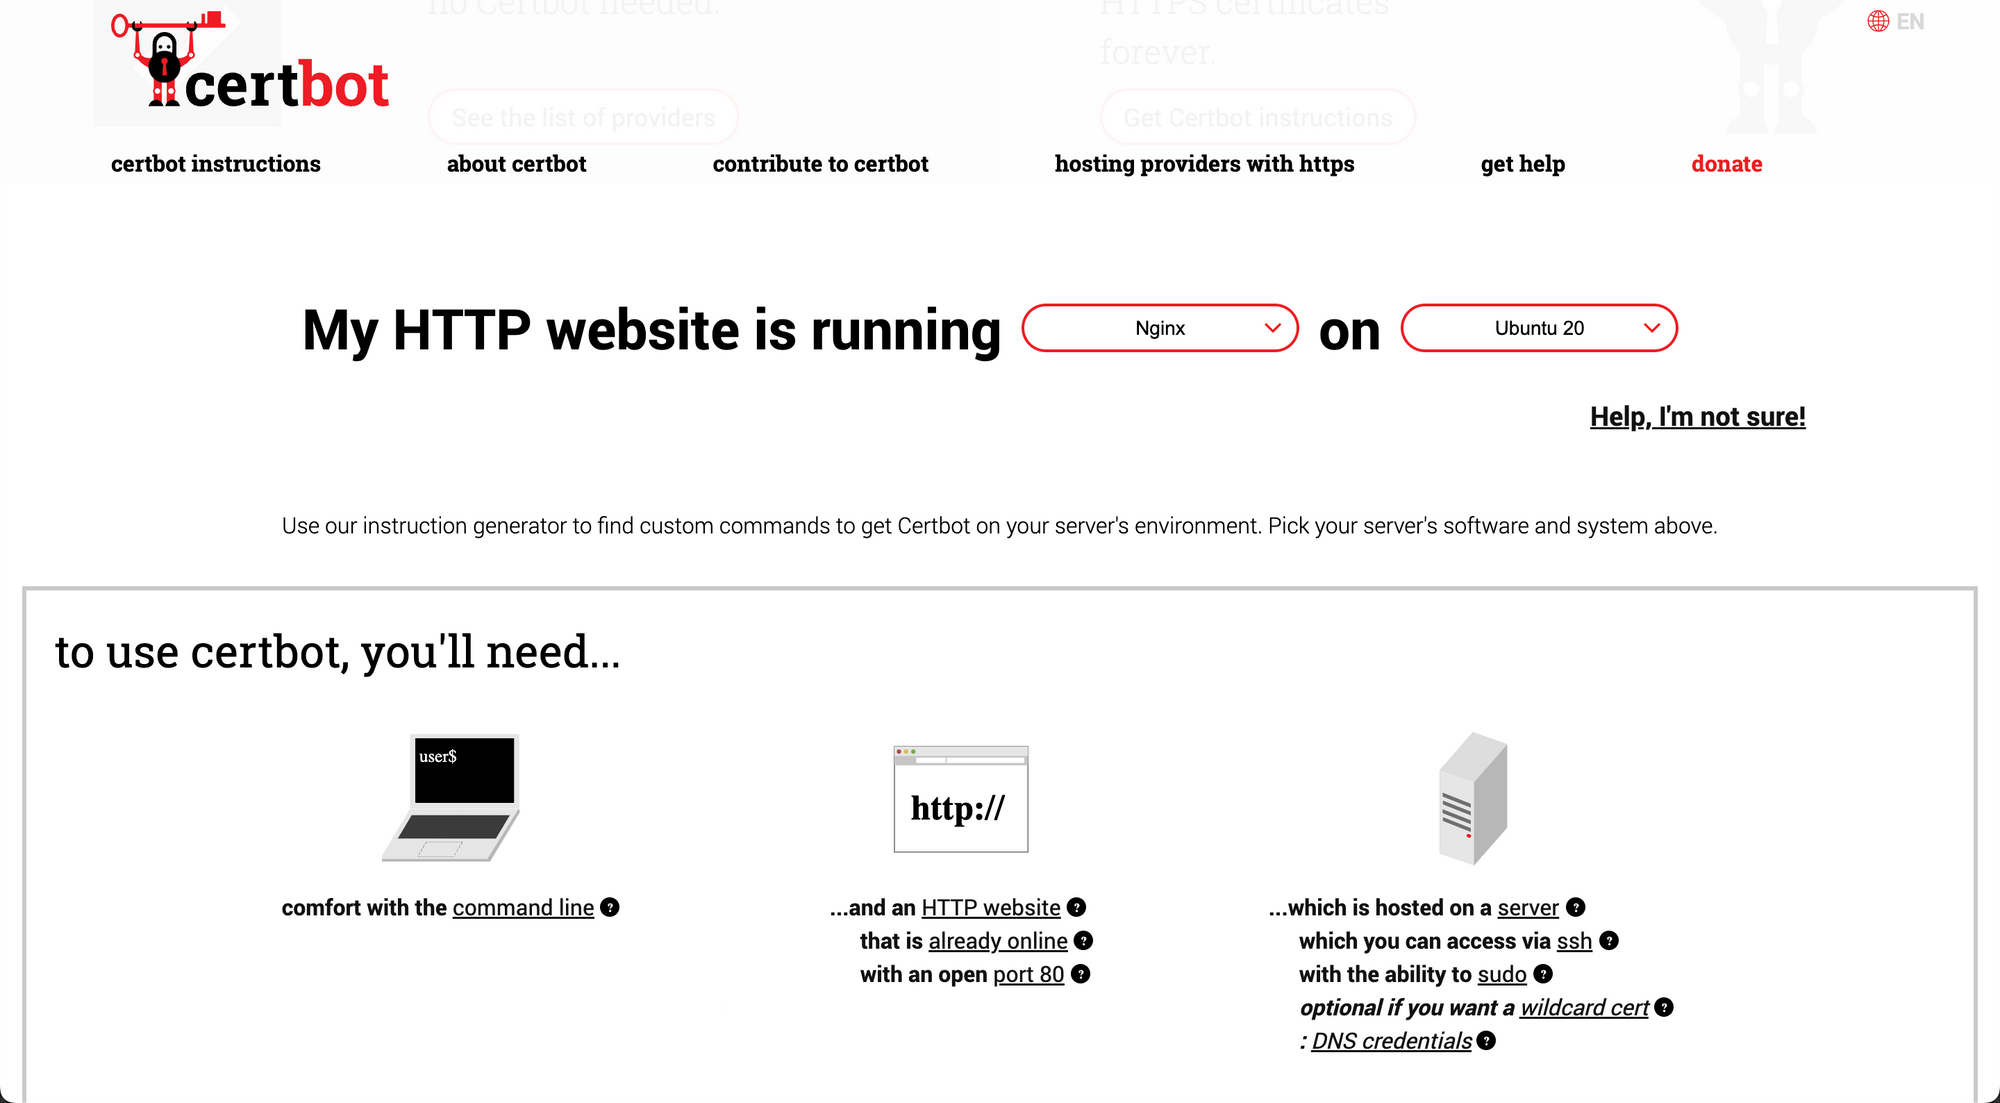
Install certbot
Go to certbot's website, pick your http server and system from the list, there's no Ubuntu 22.04, choose Ubuntu 20 instead, it'll work anyway. Follow instructions on the website.
Install acme-dns-client
 acme-dns
Choose the right build for your system:
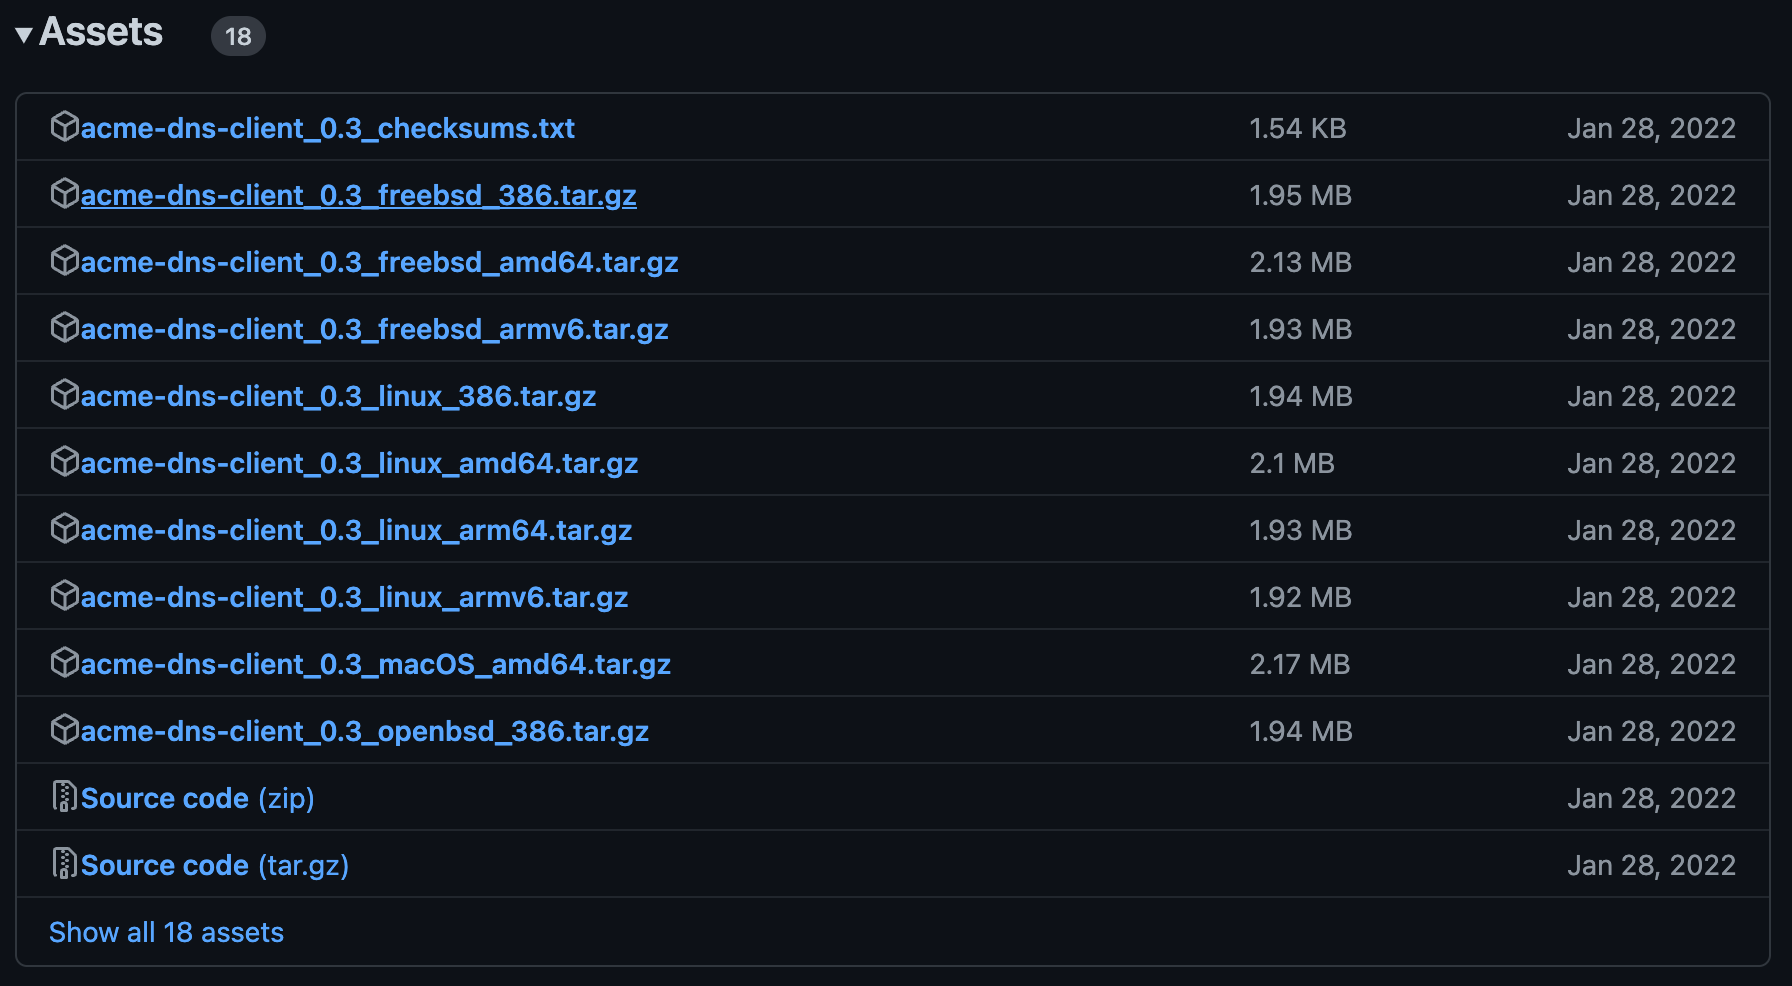
Download and install acme-dns-client:
wget https://github.com/acme-dns/acme-dns-client/releases/download/v0.3/acme-dns-client_0.3_linux_amd64.tar.gz
tar -xvf acme-dns-client_0.3_linux_amd64.tar.gz
sudo mv acme-dns-client /usr/bin
Register certbot account
sudo certbot register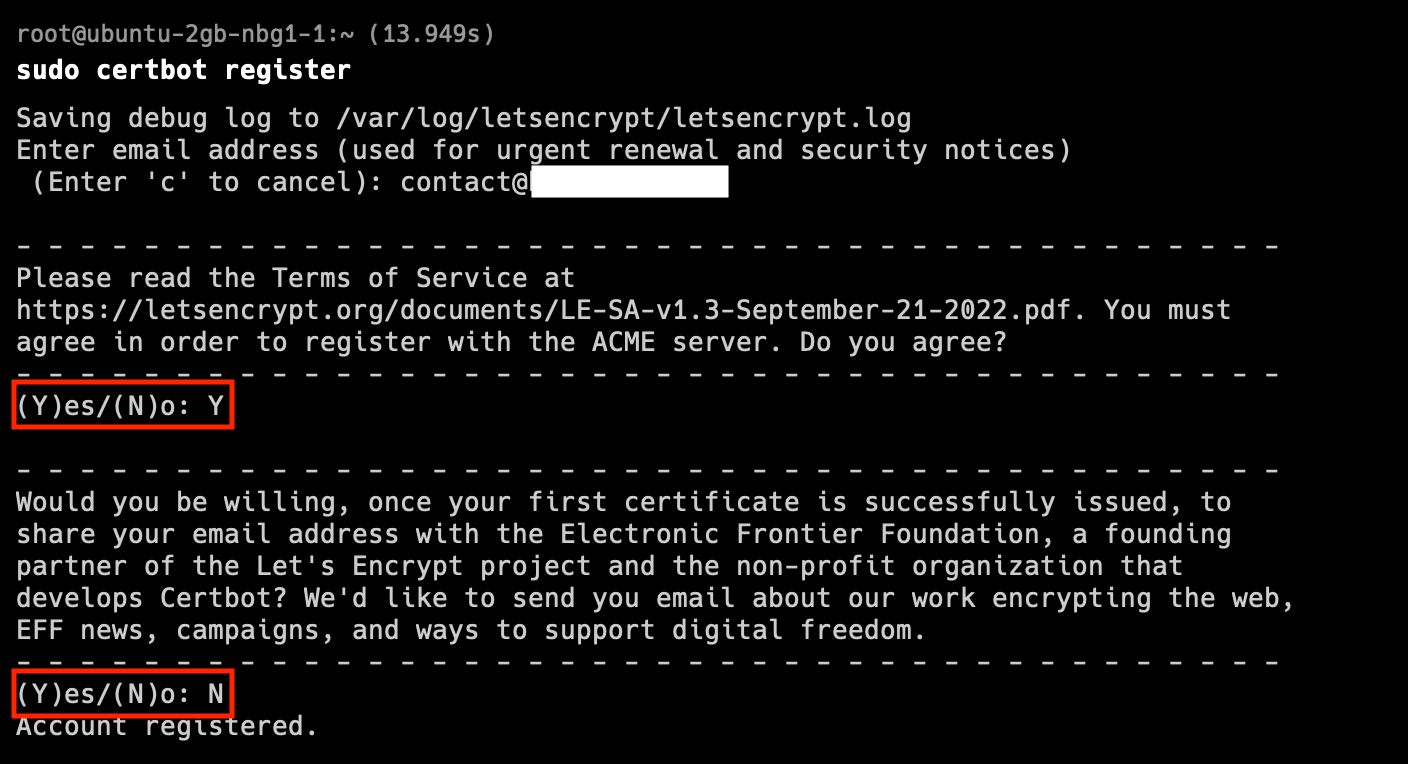
Register domain
sudo acme-dns-client register -d *.example.com -d example.com -s https://auth.acme-dns.io --dangerous[*] New acme-dns account for domain *.example.com successfully registered!
Do you want acme-dns-client to monitor the CNAME record change? [Y/n]: Y
To finalize the setup, you need to create a CNAME record pointing from _acme-challenge.example.com.
to the newly created acme-dns domain 2dcda7c1-2d31-41b5-a08b-b33b0394123f.auth.acme-dns.io
A correctly set up CNAME record should look like the following:
_acme-challenge.example.com. IN CNAME 2dcda7c1-2d31-41b5-a08b-b33b0394123f.auth.acme-dns.io.
Waiting for CNAME record to be set up for domain example.com
Querying the authoritative nameserver every 15 seconds.
[*] CNAME record is now correctly set up!
A CAA record allows you to control additional certificate issuance safeguards. The currently supported
version allows the domain owner to control which certificate authorities are allowed to issue certificates for the domain in question.
The certificate authorities MUST check and respect the CAA records in the validation process.
There's also a standard (RFC 8657) that extends the CAA record to limit the issuance of certificates to a specific validation
method and/or to a specific ACME account. While they can be tested using staging environment of Let's Encrypt for example,
they're not enabled in the production yet. It is still be worthwhile to configure them so you'll be protected when the feature gets enabled.
Do you wish to set up a CAA record now? [y/N]: NObtain the domain certificate
sudo certbot certonly --manual --preferred-challenges dns --manual-auth-hook 'acme-dns-client' -d *.example.com -d example.comSaving debug log to /var/log/letsencrypt/letsencrypt.log
Requesting a certificate for *.example.com and example.com
Successfully received certificate.
Certificate is saved at: /etc/letsencrypt/live/example.com/fullchain.pem
Key is saved at: /etc/letsencrypt/live/example.com/privkey.pem
This certificate expires on 2023-04-09.
These files will be updated when the certificate renews.
Certbot has set up a scheduled task to automatically renew this certificate in the background.Auto renew wildcard certificate
First, simulate auto renewal to see if everything works as expected without errors:
sudo certbot renew --manual --dry-run --preferred-challenges dns --manual-auth-hook 'acme-dns-client'You should see:
Saving debug log to /var/log/letsencrypt/letsencrypt.log

- - - - - - - - - - - - - - - - - - - - - - - - - - - - - - - - - - - - - - - -
Processing /etc/letsencrypt/renewal/example.com.conf
- - - - - - - - - - - - - - - - - - - - - - - - - - - - - - - - - - - - - - - -
Account registered.
Simulating renewal of an existing certificate for example.com

- - - - - - - - - - - - - - - - - - - - - - - - - - - - - - - - - - - - - - - -
Congratulations, all simulated renewals succeeded:
  /etc/letsencrypt/live/example.com/fullchain.pem (success)
- - - - - - - - - - - - - - - - - - - - - - - - - - - - - - - - - - - - - - - -
Edit your root crontab:
sudo crontab -ePaste in:
0 2 */75 * * certbot renew --manual --preferred-challenges dns --manual-auth-hook 'acme-dns-client'Install certificate in nginx
server {
    listen 443 ssl;
    listen [::]:443 ssl;
    ssl_certificate /etc/letsencrypt/live/example.com/fullchain.pem;
    ssl_certificate_key /etc/letsencrypt/live/example.com/privkey.pem;

	root /var/www/html;
	index index.html;
	server_name example.com;

	location / {
		try_files $uri $uri/ =404;
	}
}Auto redirect http to https in nginx
server {
    listen 80 default_server;
    listen [::]:80 default_server;
    return 301 https://$host$request_uri;
}Finish line
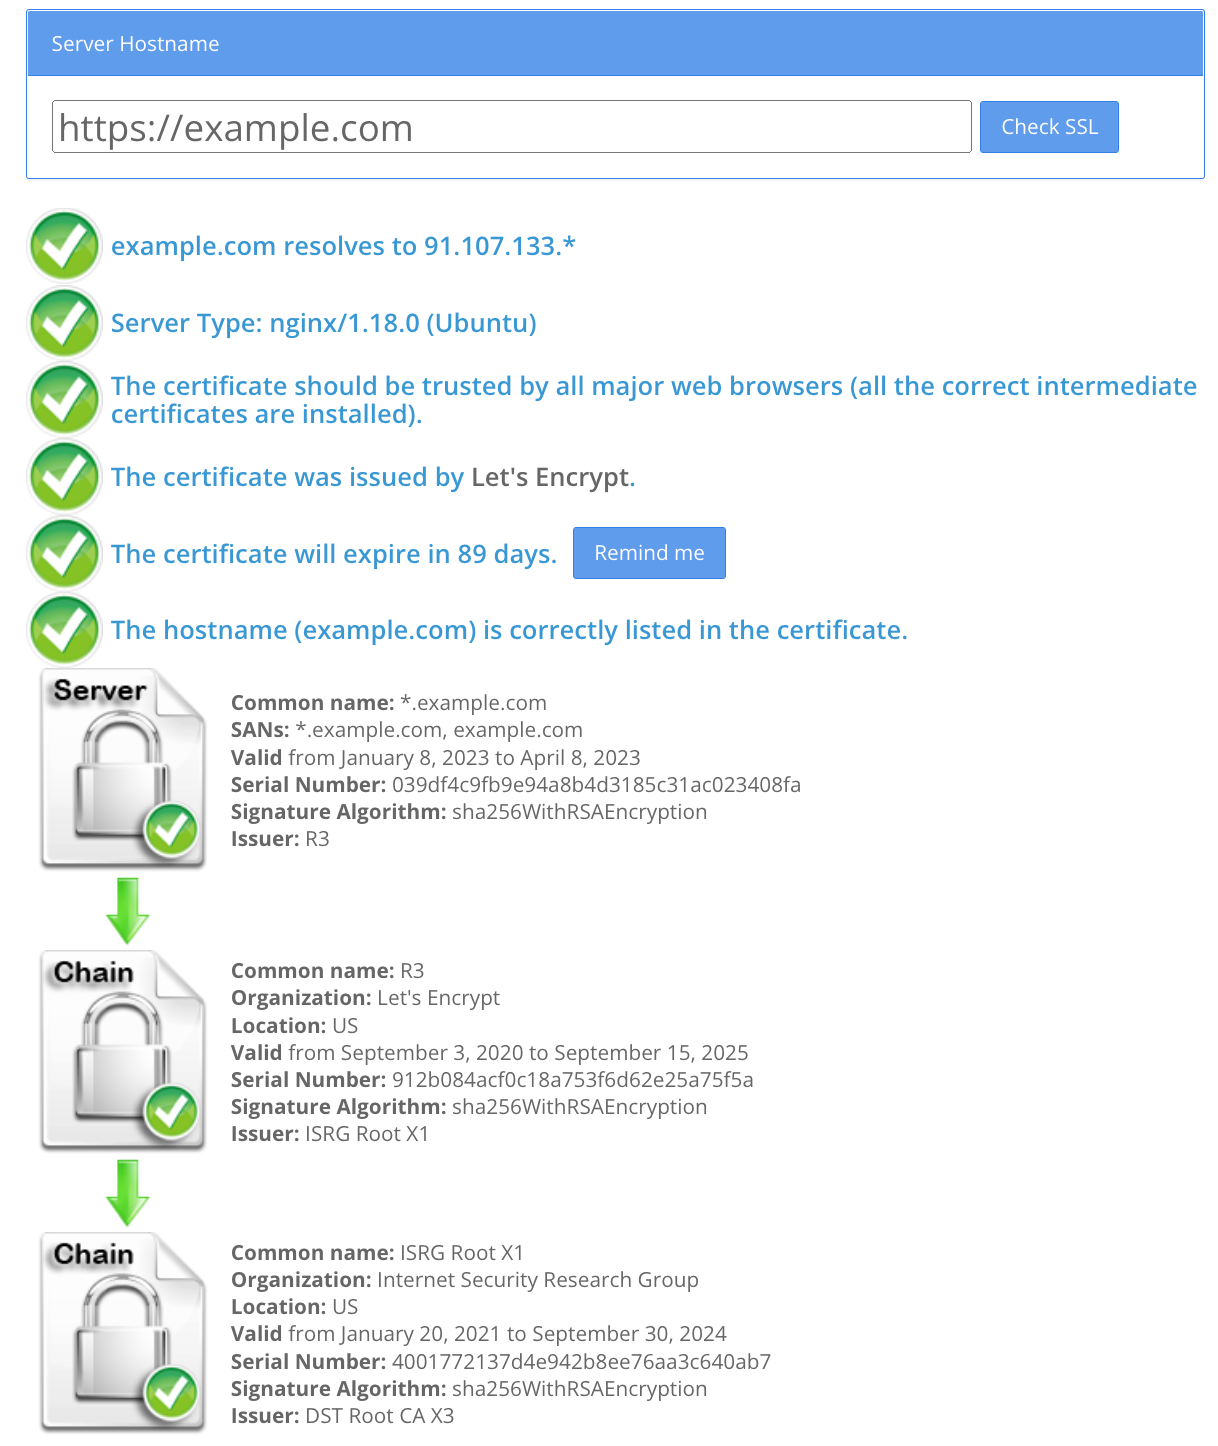
And voila! Now your Let's encrypt certificate will auto renew every 75 days. Let's check our SSL on SSL checker.
https://www.sslshopper.com/ssl-checker.html