
Introduction
Three years ago, I moved into a two-story, 90-square-meter apartment with a modern Junkers gas heater. The house itself is quite well insulated, but there was no control over heating other than “old-fashioned” valves on radiators in each room and manually regulating the heating temperature on the heater itself. Some of my neighbors chose a single-room wireless thermostat, resulting in uneven heating throughout the day.
Motives
Consider the following scenario: You have a thermostat in your living room, which also has a kitchen; you begin cooking; the thermostat senses a greater temperature and the heater turns off; the rest of the rooms on the second floor are excessively cold as a result. This solution did not sit well with me.
I was also considering using something already on the market, but the solutions I found were either too expensive for what they could do or lacked functionality. Plus, I didn’t want smart valves on all of my radiators because they’re large and clunky, and even if I did choose to use smart valves on my radiators, I’d still need something to control my gas heater; running it 24/7 wouldn’t be very smart.
System requirements
That’s when I began to consider my own solution and how long it would take me to put it into action. I’ve determined I absolutely require those features:
- The option to set each room’s temperature separately for each hour, for example, warming up the bedroom and toilet before getting up.
- The ability to override scheduled temperatures if necessary.
- Accessibility via any external network as well as on my mobile phone.
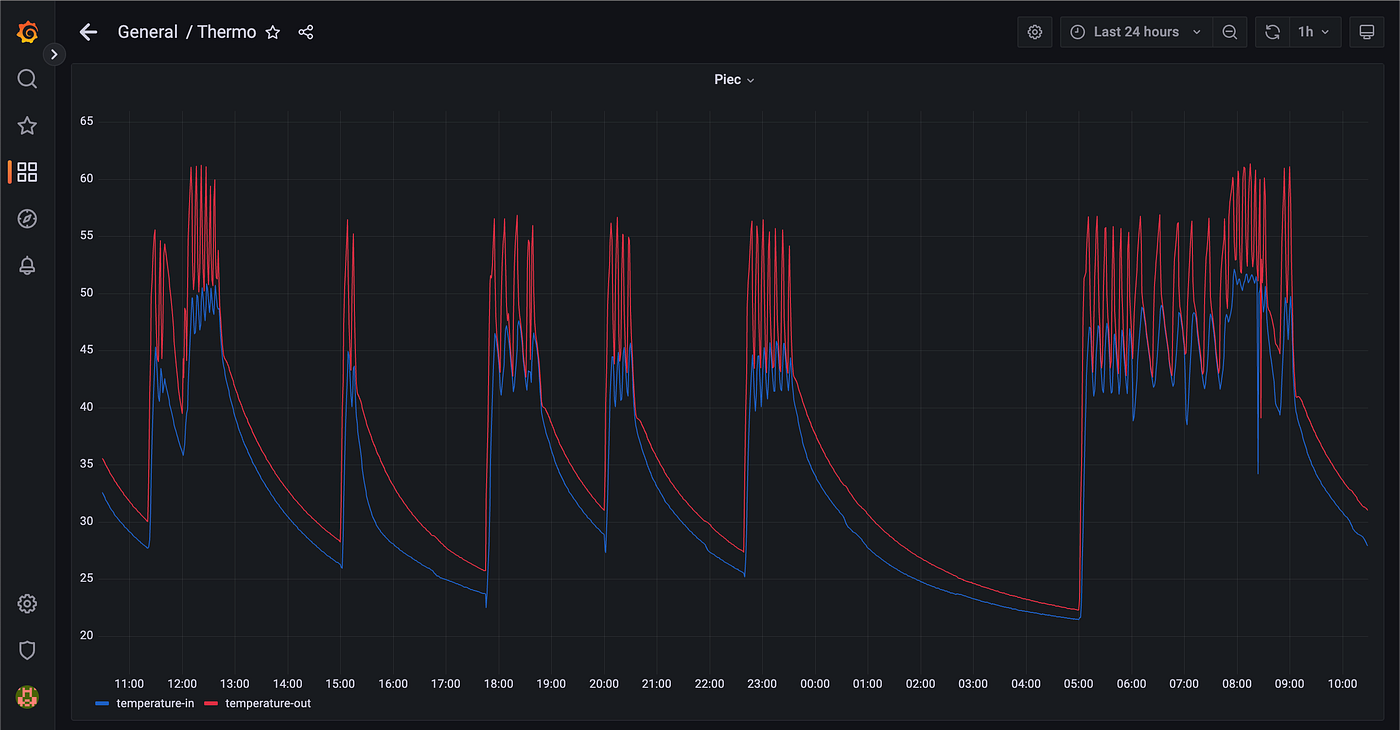
- Keeping an eye on the heater’s output and return temperatures.
Investigation, research and build parts.
My investigation started with the electric valves, which are the most important part of the system. I discovered 1/2" electric valves like these after some investigation and reading on hydraulic forums:
I chose the Aqara WSDCGQ11LM temperature and humidity sensor because it has good reviews and is Zigbee2MQTT compatible.
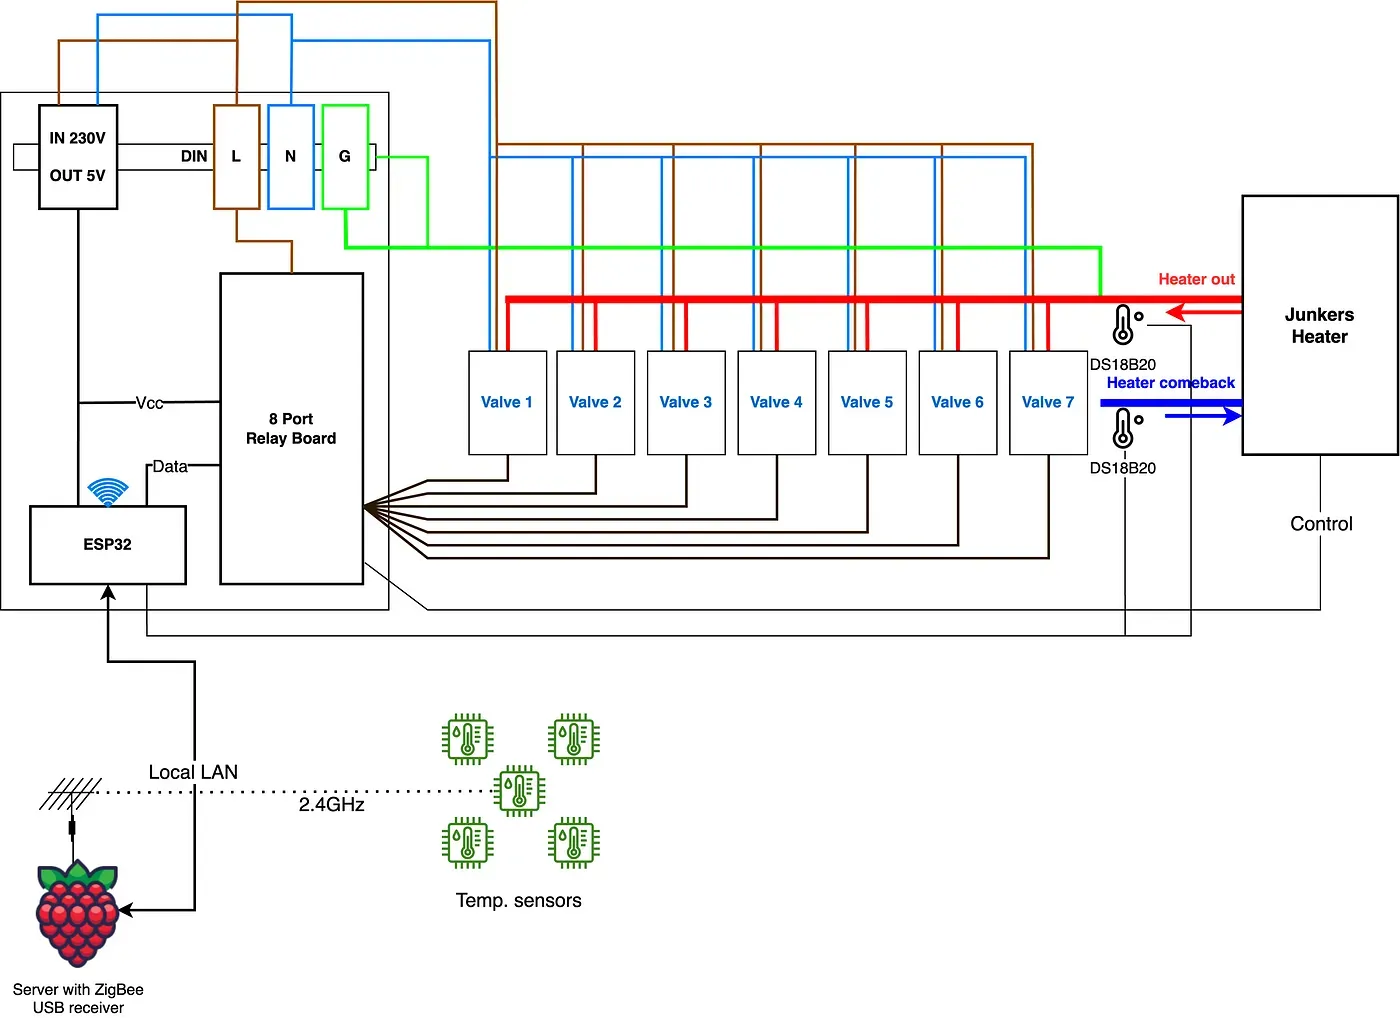
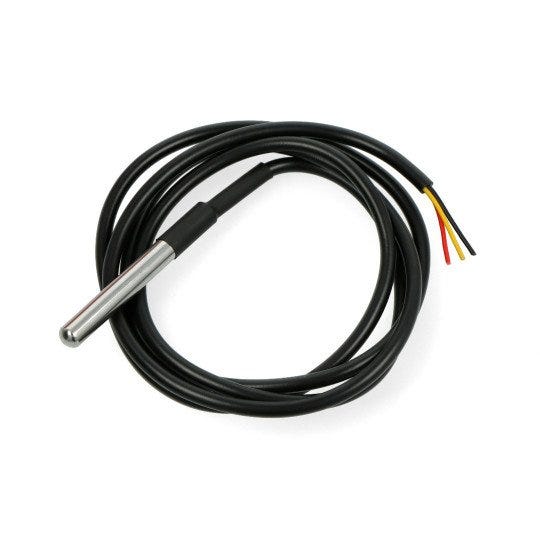
An ESP32 board, an 8-port relay board, two DS18B20 temperature sensors, a home server for hosting the user interface, and a USB to Zigbee antenna round out the system.
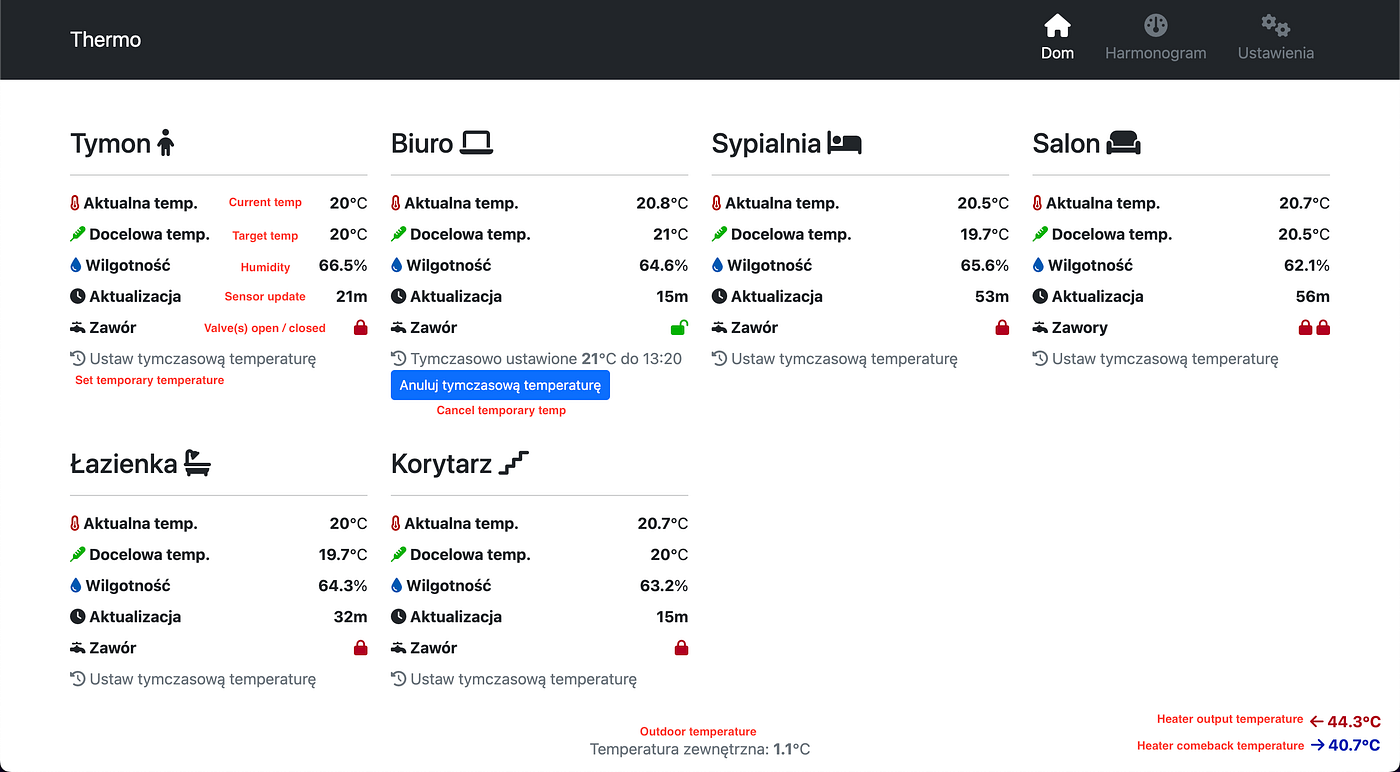
The user interface looks like this: because it’s in Polish, I added translations in red; you can check the current temperature and humidity of each room, whether the valve(s) are open or closed, and how recently the sensor delivered an update.
I utilized Highcharts.js and their fantastic draggable chart feature for the scheduling module, the schedule is sent back to the server after every drag.

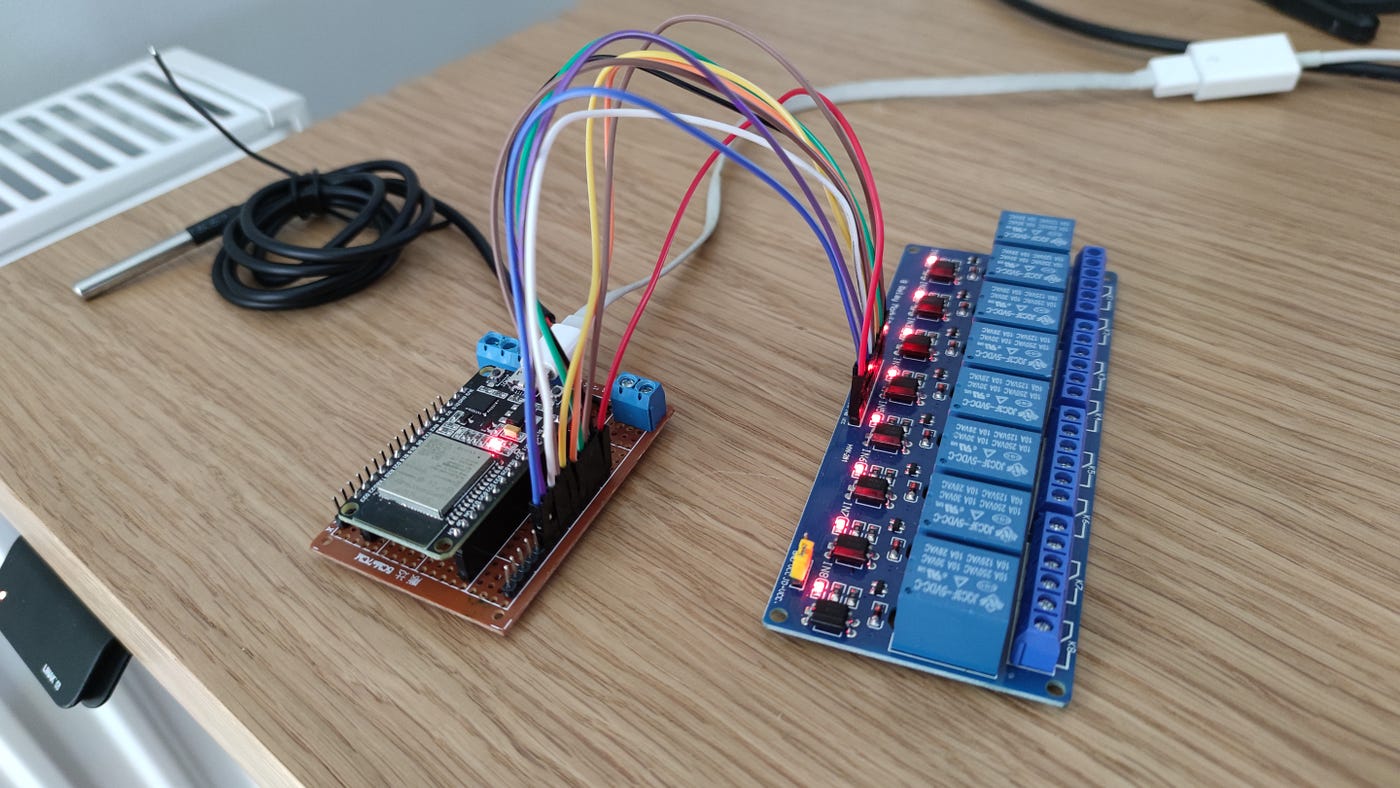
On top of a grey plastic board, the actual physical layer was built, and it looks like this:

Technical details
The frontend was written in Vanilla JS and Bootstrap 5. On the backend, I used Go 1.19 and Sqlite. The user interface is exposed to the outside world using a persistent autossh reverse tunnel, thanks to which I can access.
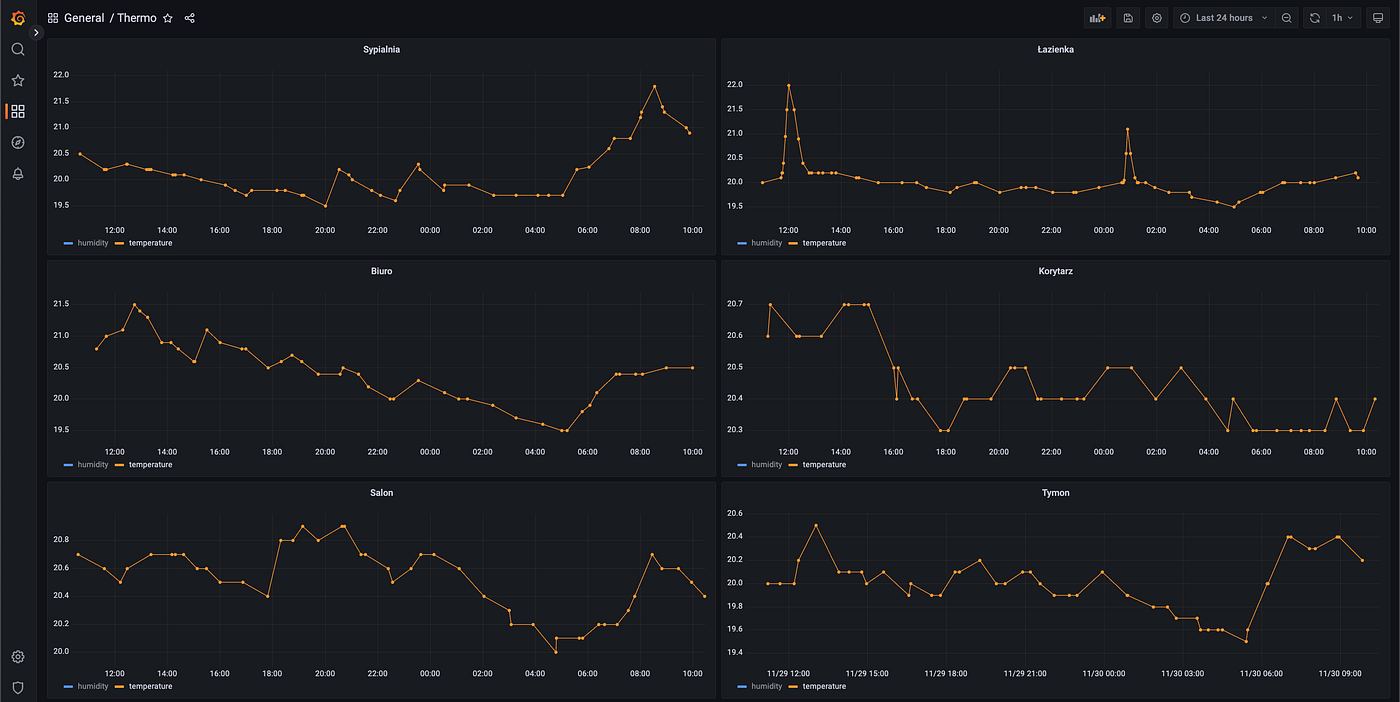
I also connected Grafana to sensor data.
Summing up
Savings are hard to figure out exactly because of things like the weather, how strong the wind is, how humid it is, how much you cook, and so on. When compared to the previous year, gas usage has been cut by roughly 23%, and thermal comfort has increased substantially, with a warm bedroom and toilet in the morning, an evenly heated living room during the day, and a cool 18°C during the night to aid perfect sleep.
This build cost about 380 euros in total as of June 2022.