
Introduction
In this tutorial, we’ll be discussing how to set up Transmission torrent client with VPN using Docker. This will help protect your identity and keep you safe from potential legal ramifications while downloading content. The transmission setup process is relatively straightforward, although some minor nuances need to be taken into consideration before starting the installation process.
 haugene
Motivation
More and more people are turning to downloading torrents due to the sheer number of streaming services available. With so many services charging for their content, it can be difficult to watch what you want without breaking the bank. Torrenting allows users to download content quickly and securely – though it does come with some legal risks associated with copyright infringement. Using a VPN to hide your IP address, you can protect your identity and keep yourself safe while downloading content.
What is Transmission
Transmission is a popular BitTorrent client which allows users to download files over peer-to-peer networks. It’s open-source and has been around since the early days of file sharing. Transmission has both a web interface and native apps for macOS, Android, and Linux. Transmission is fast, easy to use, and secure, making it an ideal choice for torrent users who want to protect their identity while downloading content.
Prerequisites
Before you can begin setting up transmission with VPN using Docker, there are a few things you’ll need to have in place:
• A reliable internet connection
• An active VPN subscription
• Docker installed and running on your machine
Getting settings and credentials from your VPN provider
The next step is to get the settings and credentials from your VPN provider. The OpenVPN protocol requires a special configuration file (.ovpn) for transmission to connect through the VPN. You will need to go to your VPN provider's website and get this configuration file. Once you have it, you can move on to configuring transmission with docker.
Example: How to get credentials and .ovpn on NordVPN
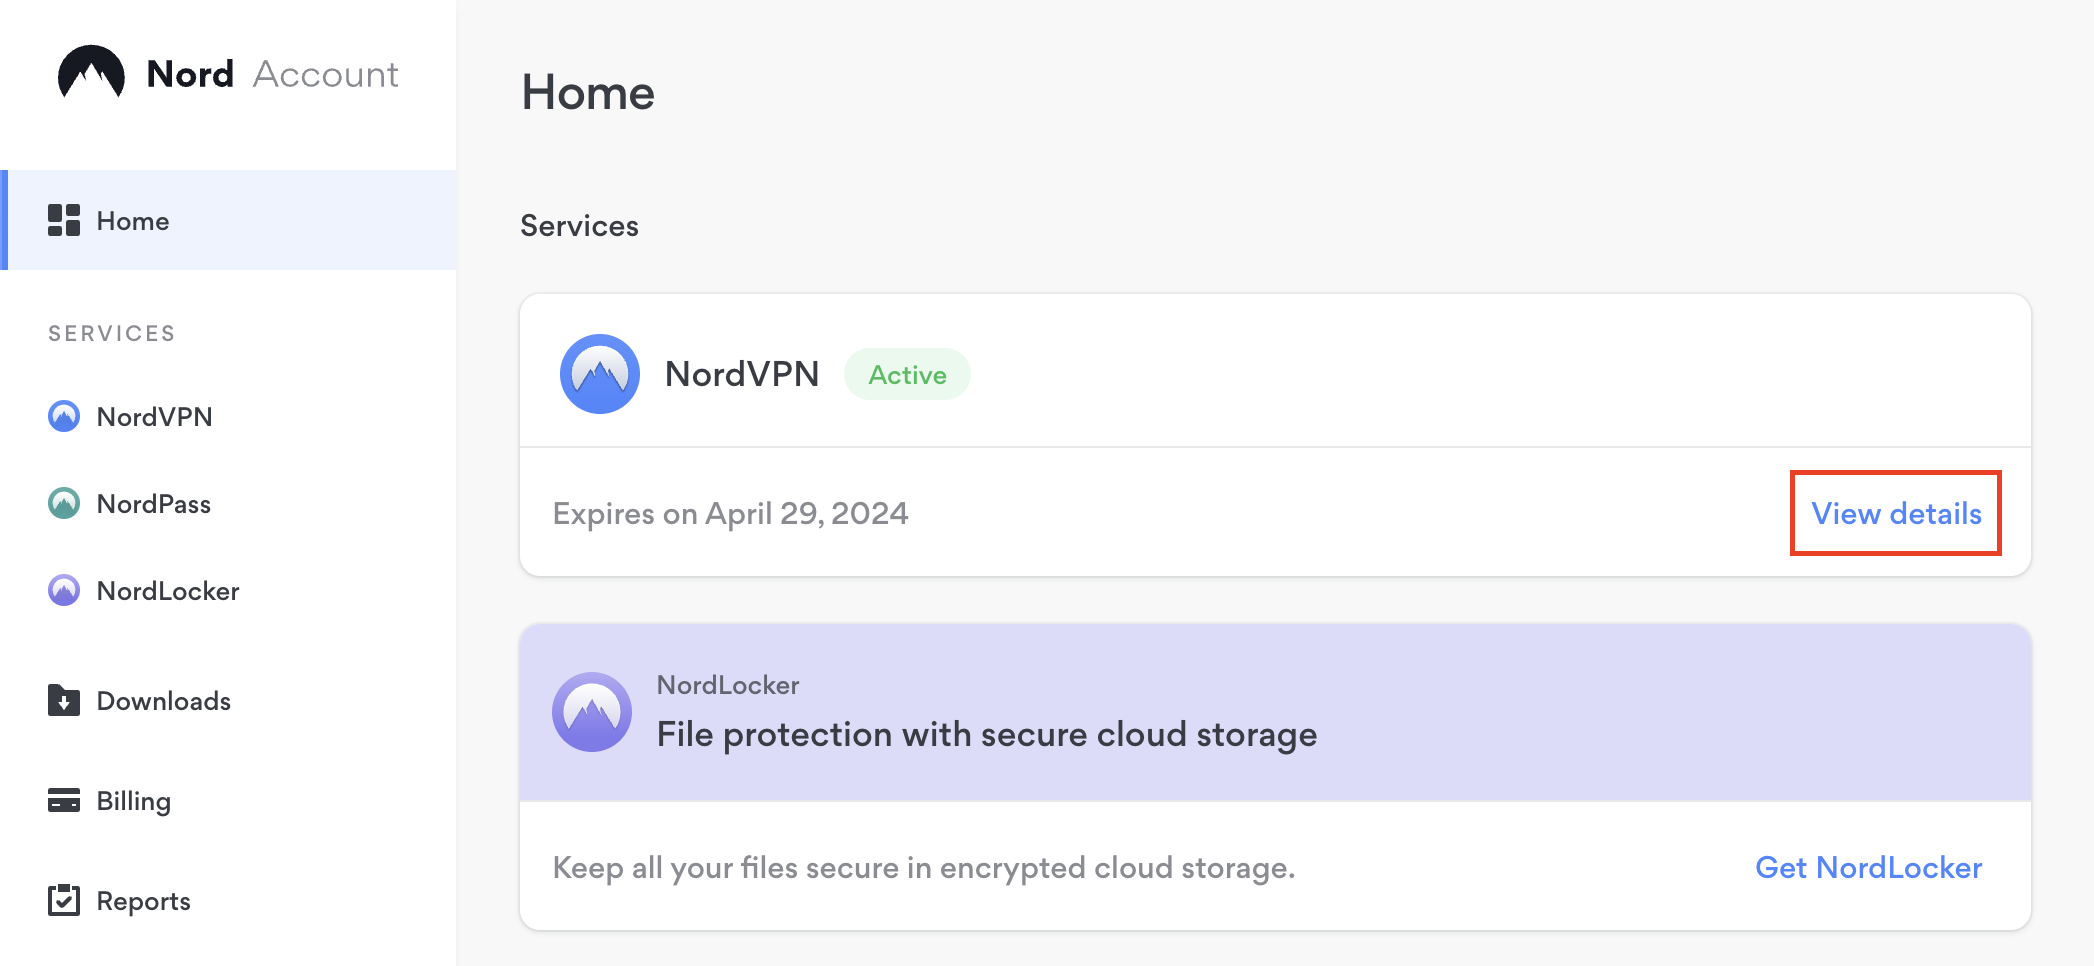
First, log in to your NordVPN account, and click "View details" on your VPN subscription.
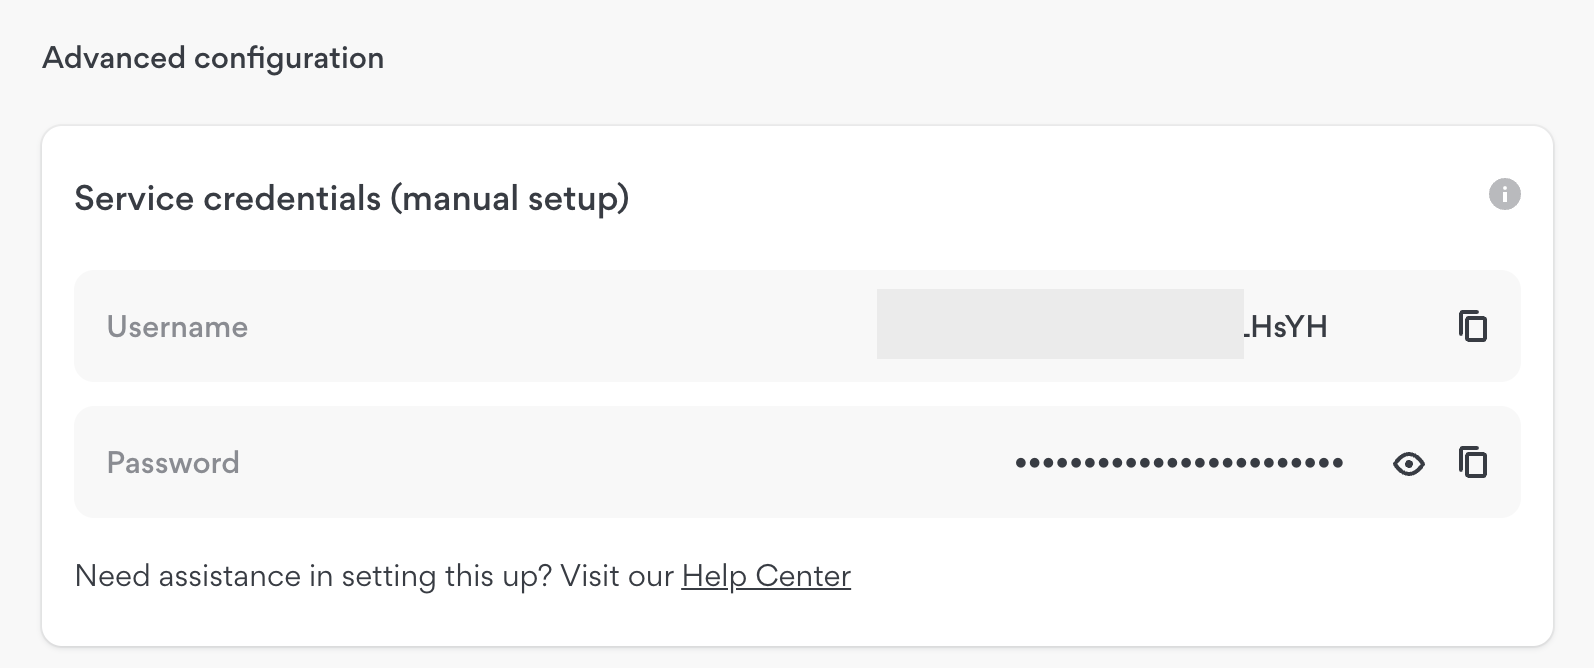
Next, scroll down and look for "Service credentials", you should see the username and password. You'll need both for your docker-compose.yml file.
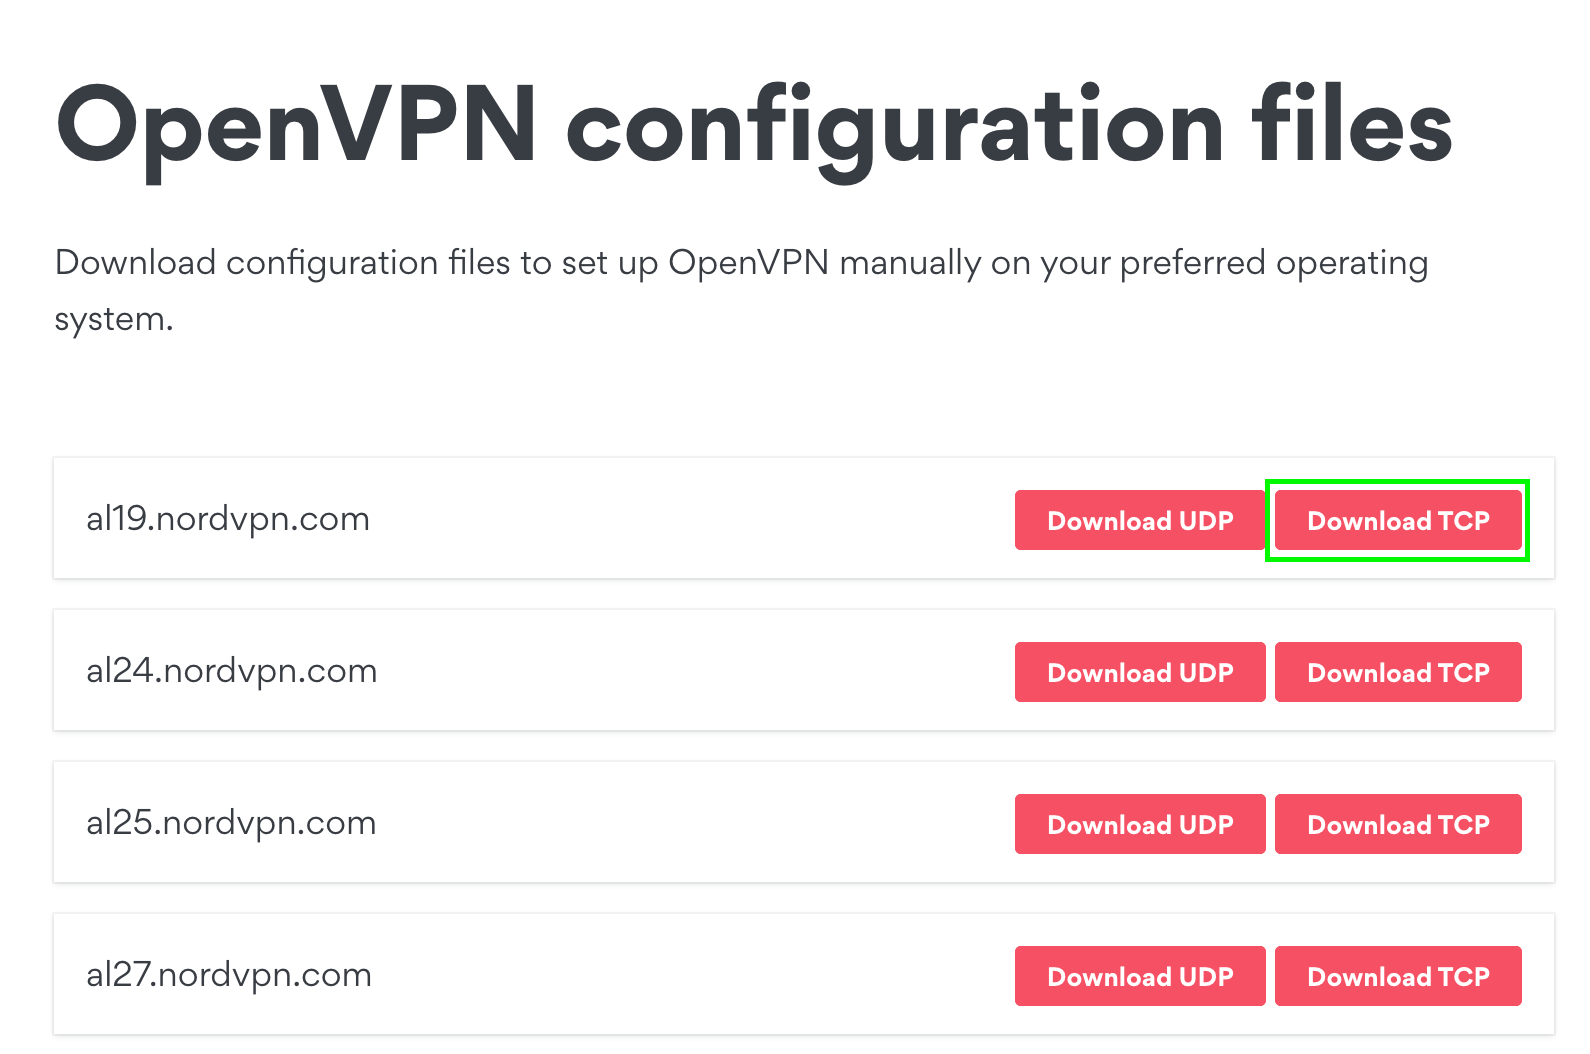
Next, download the .ovpn configuration file, for NordVPN you can visit this page. If you're using another VPN provider, simply Google for "provider-name ovpn download" and you should see plenty of results, if you see none, you'll need to contact your provider directly and request a .ovpn file corresponding to your account.
Setting Up Transmission with VPN Using Docker
Create a new file called docker-compose.yml and paste in:
version: '3.3'
services:
    transmission-openvpn:
        sysctls:
          - net.ipv6.conf.all.disable_ipv6=0
        cap_add:
            - NET_ADMIN
        volumes:
            - '/path/to/data:/data'
            - '/path/to/config.ovpn:/etc/openvpn/default.ovpn'
        environment:
            - OPENVPN_PROVIDER=NORDVPN
            - OPENVPN_USERNAME=username
            - OPENVPN_PASSWORD=password
            - LOCAL_NETWORK=192.168.0.0/16
            - NORDVPN_COUNTRY=BE
        logging:
            driver: json-file
            options:
                max-size: 10m
        ports:
            - 9091:9091
            - 8200:8200
        image: haugene/transmission-openvpn
        restart: unless-stopped
Before starting up you will need to replace the following variables:
/path/to/data - Where your torrents will be downloaded to.
/path/to/config.ovpn - Path to your .ovpn configuration file.
OPENVPN_PROVIDER - Choose one from the list of available providers.
OPENVPN_USERNAME - Username you got from your VPN provider
OPENVPN_PASSWORD - Password you got from your VPN provider
LOCAL_NETWORK - Set this to what your network subnet looks like, if IPs of your devices are in the 192.168.*.* range then you can keep this parameter as is.
NORDVPN_COUNTRY - You only need this parameter if your provider is NordVPN, check provider specific settings for more details on configuration of different VPN providers.
Once your docker-compose.yml is ready, open up your terminal and type in docker compose up -d. Wait until docker is done downloading and setting up your containers.
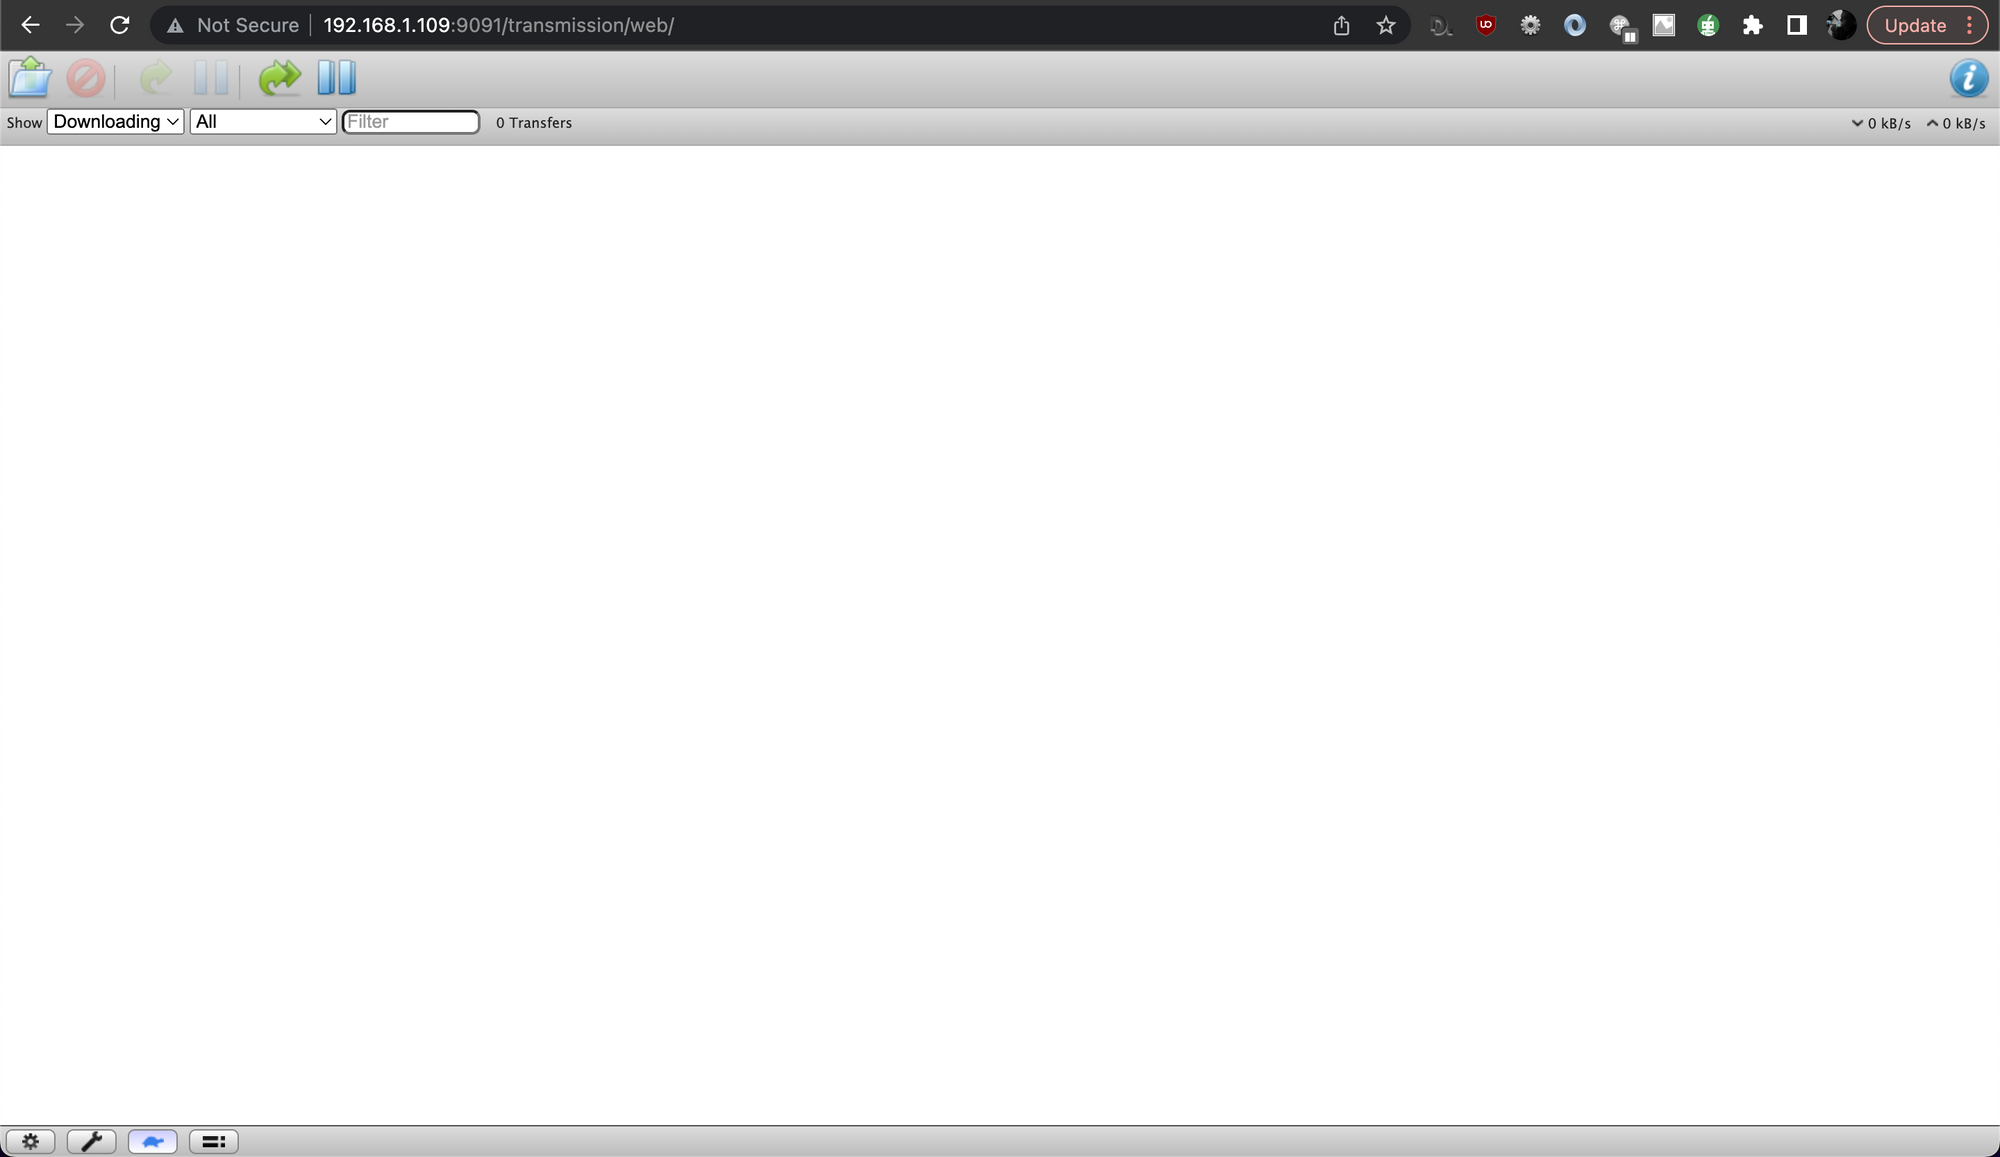
Now, open up your browser and type in: http://your-server-ip:9091 you should see the transmission web ui like this, voila! You can now start safely downloading!
Why Using Dockerised Transmission + VPN is Safer and More Reliable than Using an External Killswitch
Using a docker container with a VPN is much safer and more reliable than using an external killswitch that stops the transmission (torrent) process if the VPN connection drops. By running transmission in a docker container, all traffic from transmission is routed through the VPN, ensuring that your identity remains secure even if the connection drops. Additionally, using a docker container ensures that transmission can’t access any other files or services on your machine, thereby keeping transmission isolated from any potential threats. Finally, docker containers are easy to maintain, meaning you’ll have fewer problems regarding setting up transmission with a VPN. All these factors combined make using transmission within a docker container with a VPN much better and safer than using an external killswitch.
Transmission Clients
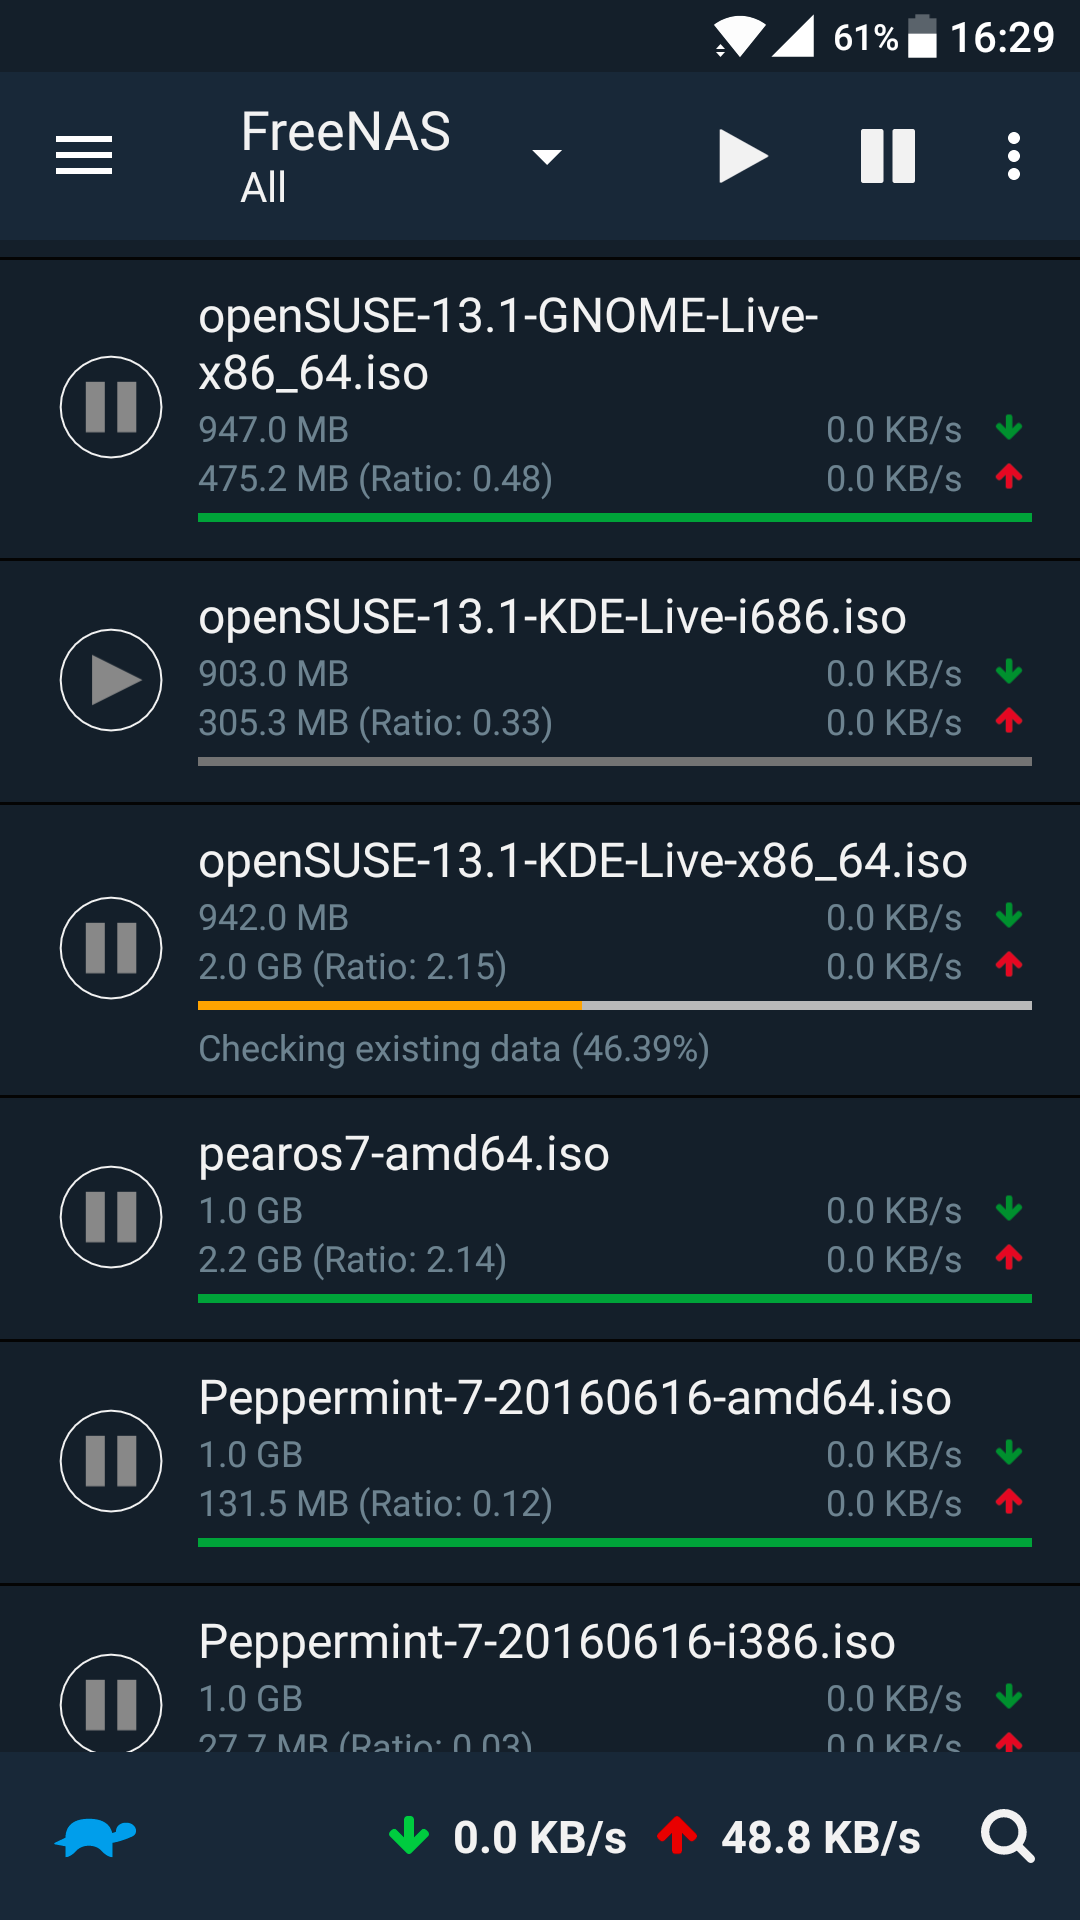
Android
Transmission remote app is a third-party client for transmission, the popular torrent client. The app provides access to transmission’s web interface from your Android phone or tablet. It allows you to manage your downloads, start and pause torrents, remove them and more, directly from your device. It also offers push notification support for important events, such as when a file has finished downloading.
Mac, Linux and Windows
Transmission Remote GUI is a feature-rich cross-platform application that allows you to remotely control transmission-daemon via its RPC protocol. It provides a uTorrent-like interface and gives you the ability to select files for download, choose priorities for each file, view details about connected peers, and get full information about each torrent. It also offers transmission options, such as setting per-torrent options. This makes it a great choice for those who want an easy-to-use, yet powerful tool to remotely control transmission-daemon. It's faster and has more functionality than the built-in transmission web interface, making it an ideal option for users who need quick access to their transmission settings.
transmission-remote-guiAccessing your Transmission from anywhere using SSH tunneling
Are you looking for a way to access your Transmission server from outside your home? With SSH port forwarding, the answer is "yes"! This method will allow you to securely expose your server to the outside world, so that you can easily access it wherever you may be.

Summary
This article explains how to setup transmission on Docker with VPN for added protection and reliability. It outlines the steps needed to get the settings and credentials from the VPN provider, including an example of how to do so with NordVPN. Instructions for setting up transmission with Docker are also provided, along with details about why it is safer and more reliable than using an external killswitch.
Bonus memes


Happy downloading!